On The Workbench... 2011
Round2 / AMT's Vulcan Shuttle Surak

June 2011
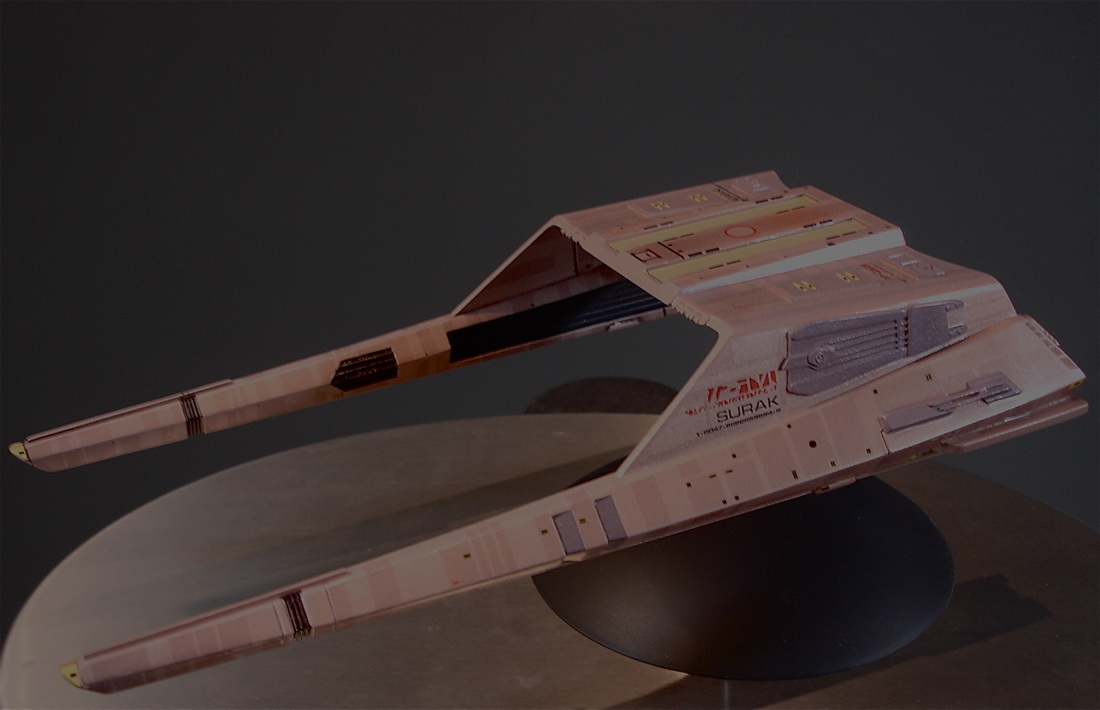
Here are some quick snaps of the Vulcan shuttle taken before I embark on the arduous task of covering her in the massive array of aztec-ing and marking decals.
The small amount of detail painting is finished and the entire model has been airbrushed with a gloss coat of Kleer Floor polish (a.k.a. Future) ready to accept the waterslide decals.
Although the following photos show the overall colour to be a light metallic copper, I did actually base coat the vehicle with a pinkish mauve very closely imitating the original molded colour of the kit. Once dry I carefully "dusted" a coat of Gunze Metallic Copper (which is quite a light copper-almost-gold colour) over top. In most instances the mauve base coat still shows through. This is more apparent in the bottom photo.
The reason I tried this technique was because nobody ever believes you when you tell them the original studio model was painted a dusty pink colour. And for good reason too, as in the few seconds we get to see this magnificent craft in TMP it certainly looks more of a desert tan colour. So hence my experiment to achieve the best of both worlds, keeping my rendition studio and "memory" accurate.


October 2011
And now, finally, we have some pics here of the sled laden with most of the aztec and marking decals. Over the course of this arduous task I almost perfected the art of decal setting. The first few decals I tried proved most difficult, appearing to be thin and broken on the backing sheet, but more likely due to my rusty decal handling skills. I started in using Micro Set and Micro Sol solutions, but found them not performing well on the thin decals, plus they slowed up the whole process of application. So after persevering for half a dozen decals I decided to ditch the solutions in favour of a new technique I had recently heard about. Microwaving a small soft dampened cloth for about 10 seconds allowed me to not only sear the swirls and loops from my fingertips, but to also achieve the same results as the setting solutions usually offer, but in a fraction of the time! Well, almost. The photos will reveal the obvious need for more practice. All I can say is, for quick results this technique works well. Once you have the decal placed exactly where you want it you just "steam press" it with the hot cloth, paying particular attention to any contours that need adhering to. You do not want to make a mistake with the placement of your decal as once you remove the cloth it will be stuck fast and almost dry. Which also means you can move straight on to the next one. I think I managed to lay down eleven decals in less than 30 minutes down the outside flank of one of the nacelles. "Impressive", I hear you say...
And now, finally, we have some pics here of the sled laden with most of the aztec and marking decals. Over the course of this arduous task I almost perfected the art of decal setting. The first few decals I tried proved most difficult, appearing to be thin and broken on the backing sheet, but more likely due to my rusty decal handling skills. I started in using Micro Set and Micro Sol solutions, but found them not performing well on the thin decals, plus they slowed up the whole process of application. So after persevering for half a dozen decals I decided to ditch the solutions in favour of a new technique I had recently heard about. Microwaving a small soft dampened cloth for about 10 seconds allowed me to not only sear the swirls and loops from my fingertips, but to also achieve the same results as the setting solutions usually offer, but in a fraction of the time! Well, almost. The photos will reveal the obvious need for more practice. All I can say is, for quick results this technique works well. Once you have the decal placed exactly where you want it you just "steam press" it with the hot cloth, paying particular attention to any contours that need adhering to. You do not want to make a mistake with the placement of your decal as once you remove the cloth it will be stuck fast and almost dry. Which also means you can move straight on to the next one. I think I managed to lay down eleven decals in less than 30 minutes down the outside flank of one of the nacelles. "Impressive", I hear you say...
Round2 have really done a great job and turned out some very nice aztec markings. Very subtle, but they look fantastic. And when you compare the earlier shots they clearly bring this great wee model to life!
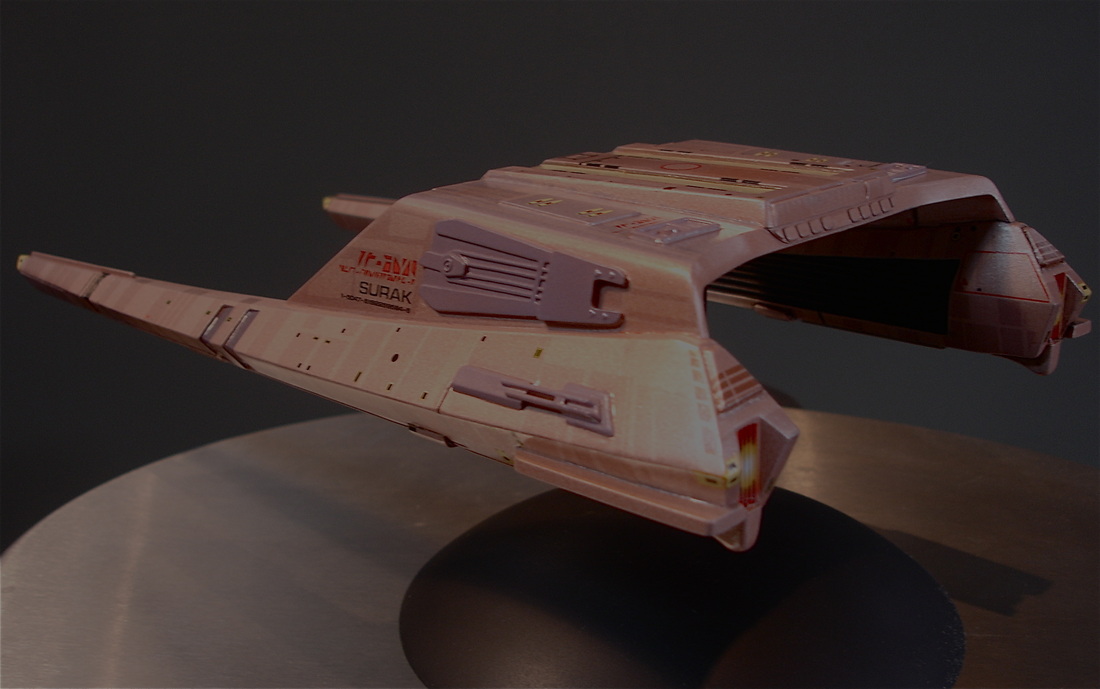
Although not too apparent here I did have some issues with settling decals into recesses and angular contours. Also I recommend, as the instructions say, leaving those "purple" panels and bits off until after you have laid the decals down. Way less cursing required and a much nicer finish!
Stay tuned. I hope to have all new pics of the finished SURAK up in the Gallery in the near future. Happy modelling people!
All images property of The Starship Factory 2010.
