Captain America
Source: The Avengers (2009)
Brand: Dragon
Scale: 1/12
Medium: Vinyl (+Injection-molded styrene)
Release Date: 2012
Pieces: 14
Life Lost: 45 hours
Enhanced: Yes (see captions)
TSF Rating: * * * * *
This was the first Dragon masterpiece I ever laid my hands on, and what a masterpiece it was! Beautifully crafted, masterfully executed, this kit was so well thought out that it was a pure pleasure to put together. All the joins fell on natural seam lines, and the parts fitted so snugly together there was no need for any filler. Mold seams were almost untraceable or nonexistent, relieving you of the tedious task of filing and sanding. With little assembly required the biggest chore of course, was in the painting.
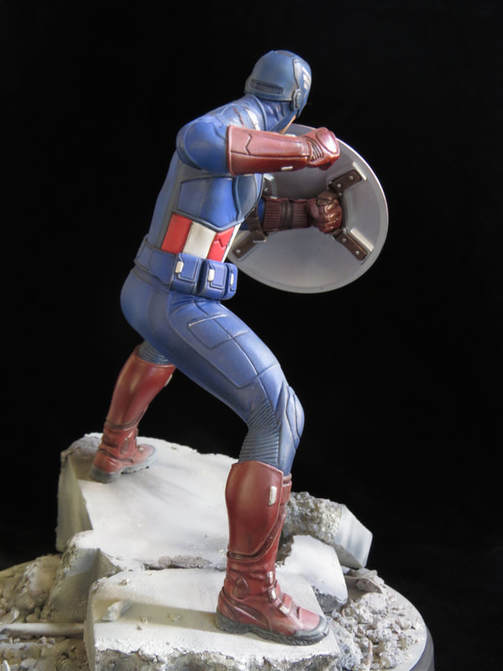
First mention must go to the scratchbuilt base. I wanted to elevate the figure to add to the dramatic pose, and due to the fact that his head is tilted down and hidden a little by the shield, I needed to somehow set the Cap'n on an incline.
First mention must go to the scratchbuilt base. I wanted to elevate the figure to add to the dramatic pose, and due to the fact that his head is tilted down and hidden a little by the shield, I needed to somehow set the Cap'n on an incline.
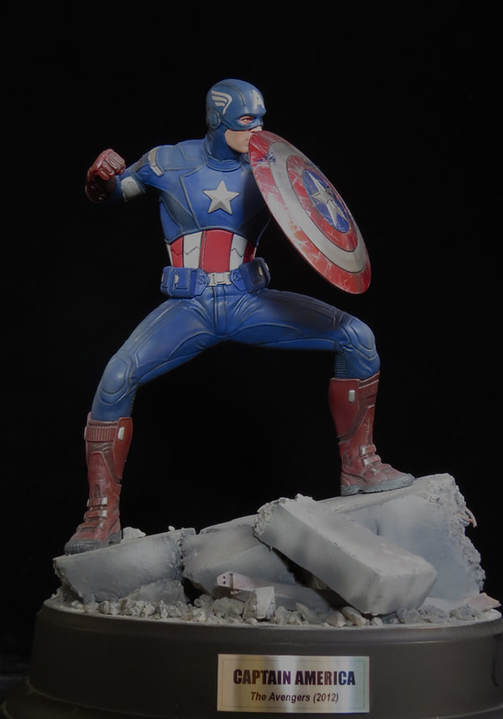
My initial idea for an appropriate base, and to acknowledge the Great Battle of New York, was to have an overturned wreck of a yellow taxi. But in 1:9th scale it was proving difficult to find something suitable, and my scratch-building skills were not up to the task.
The base elements were created with polystyrene, plaster, wire, tube, plastic i-beam, and cat litter! I firstly skimmed a slab of poly styrene with gib-stoppers plaster (drywall filler), then broke it into appropriate pieces and plastered over the broken ends a little to conceal the obvious poly texture.
The simple trick of dusting up the boots, knees etc. with light grey pigment powder ties the figure in to the base, realistically (hopefully) "grounding" it in the environment.
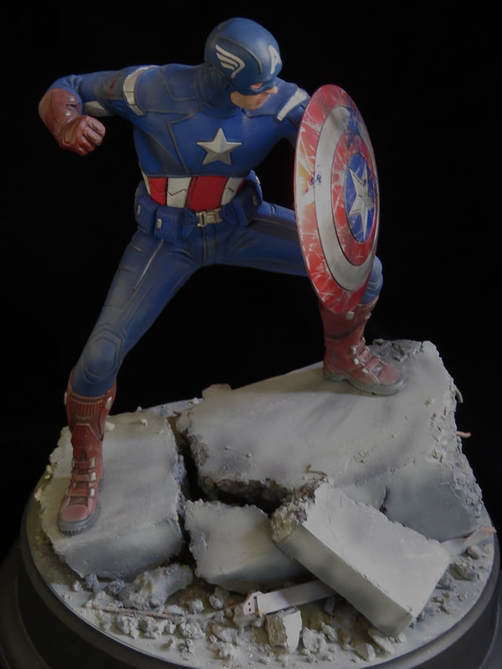
To add subtle dynamics I picked out various panels of the suit with matt and satin finishes (which are hard to make out now). And to offer a "leathery" look I used matt varnish on the boots and gloves, buffing them a little once dry.
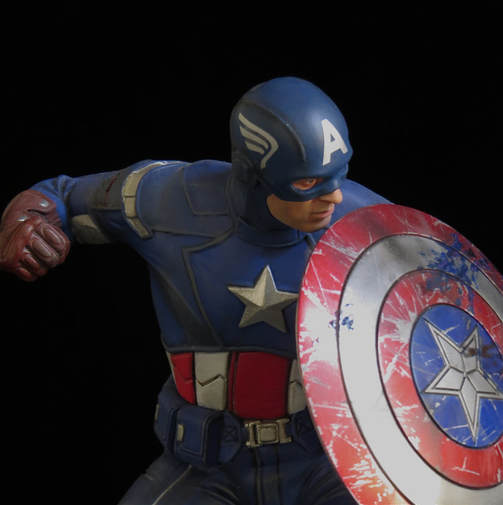
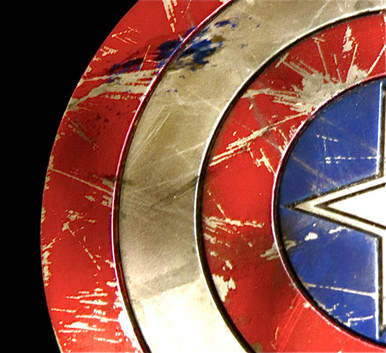
The extraterrestrial Chitauri blood spatters on the shield are more purple in reality. I found it difficult getting the right blend of colour and translucency.
Because the shield is injection molded styrene I was able to use Model Master Buffing Metalizer. After airbrushing a solid coat of bright aluminium I buffed the proverbial crap out of it, after which I masked the various panels and sprayed Tamiya translucent blue and red in the appropriate places. Then the fun part: attacking it (carefully!) with a scalpel blade to create that all-important battle damage. And combined with daubs of alien blood, airbrushed carbon scoring and dirty pin washes it certainly is battle-worn! Hmm,... too much?
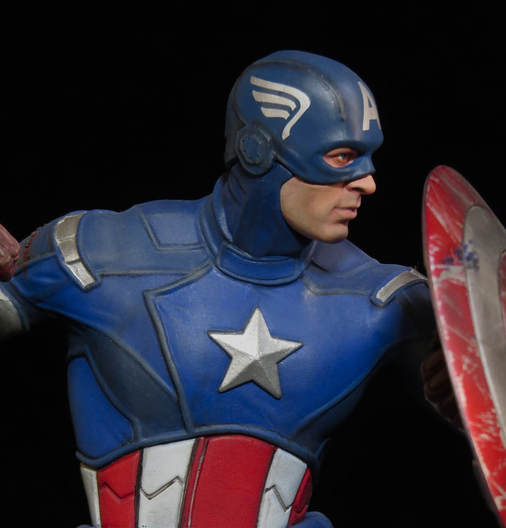
Skin tones are a constant challenge for me and no regime is the same from one figure to the next. Here though, I base coated with a light flesh colour and after painting in eye, nose and mouth details I applied a thin wash of red in lines and creases. After spraying a matt varnish I dusted the face with red and flesh pigment powders until the right blends of "blush" were achieved. Before the final seal-in with matt varnish the shaved areas were enhanced with strokes of a mid grey powder.
All images property of The Starship Factory 2017.
