On The Workbench...
2008
Fine Molds 1/72 Millennium Falcon

This awesome and rather intimidating kit of the fastest ship in the galaxy will test all my skills, knowledge, and diligence to get it "off the ground"! As if it isn't enough to tackle just the 900 piece kit I also have plans to light the interior and exterior, and set it in a diorama of the Mos Eisley spaceport, amid the shootout between Solo and Imperial troops.
Now dubbed "Project: Infinity" as so far has been out of the box for two years,... and counting!
Now dubbed "Project: Infinity" as so far has been out of the box for two years,... and counting!
Hulls

March 2008: Top and bottom hulls washed and dried, ready for the greeblies to go on! Notice I marked out the battle scarring on the upper hull. At time of photo I hadn't marked out the blaster scoring and damage on the underside. Also planned to add authenticity by "nibbling" the notches out around the perimeters of each hull.
Mandibles
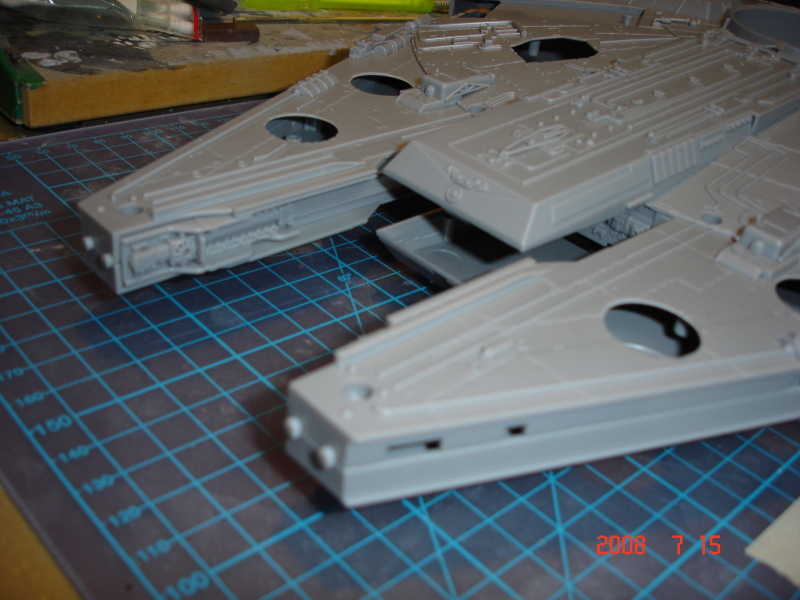
July 2008: Sorry, not a flash photo. The mandibles pretty much completed here. True to Fine Mold's form all the pieces fitted nice and snugly with barely any cleanup of seams and flash needed. Am wondering though how well this crisp shiny plastic is going to take the paint. I have noticed over the last few years that my beloved Tamiya acrylics don't stick, or etch, as well as they used to. Is it a problem with new styrene formulas or new paint formulas? Any ideas?
Upper Engine section
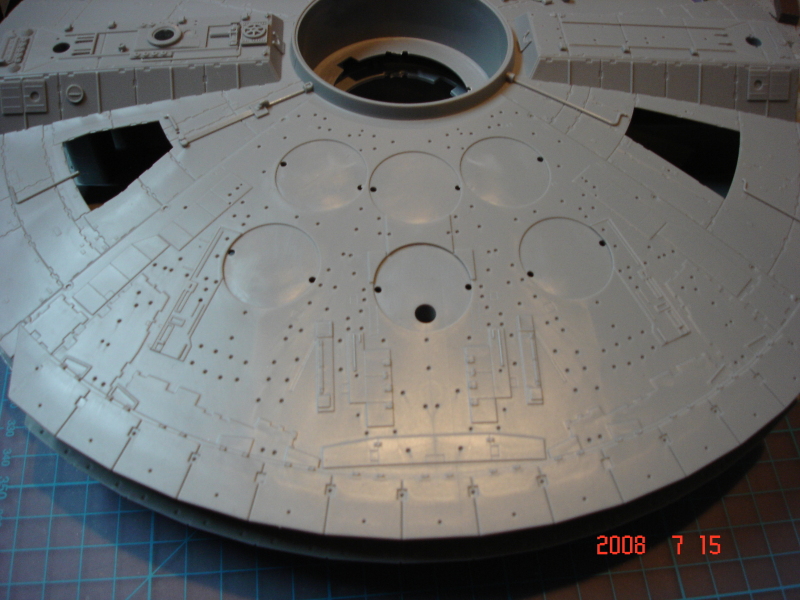
July 2008: The engine section, rear end of upper hull "sans greeblies". Wow, look at all those wee locating holes waiting to be filled!
Hulls (before and after)
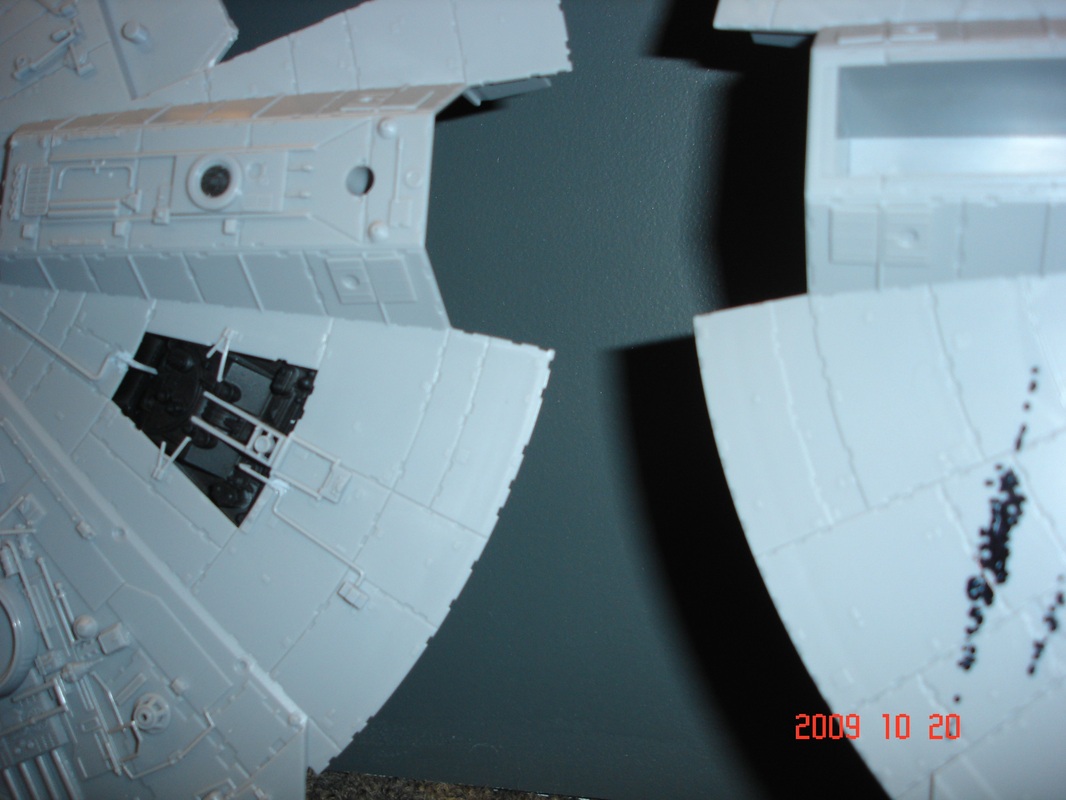
October 2009: Sheesh, it's been a long time between this and the previous photo! Here you can see I have begun "nibbling" out the notches around the upper and lower hulls. Looks more interesting now. Can also see I have marked out where the battle scarring on the lower hull will be. Now, where's my Dremmel...?
Am not sure if it will work as planned but I base coated all the exposed "man-holes" with matt black before installing them, in the hope that it would offer more depth to the detail, - as long as I'm not too heavy-handed with the top coat!
Am not sure if it will work as planned but I base coated all the exposed "man-holes" with matt black before installing them, in the hope that it would offer more depth to the detail, - as long as I'm not too heavy-handed with the top coat!
Underside engine detail
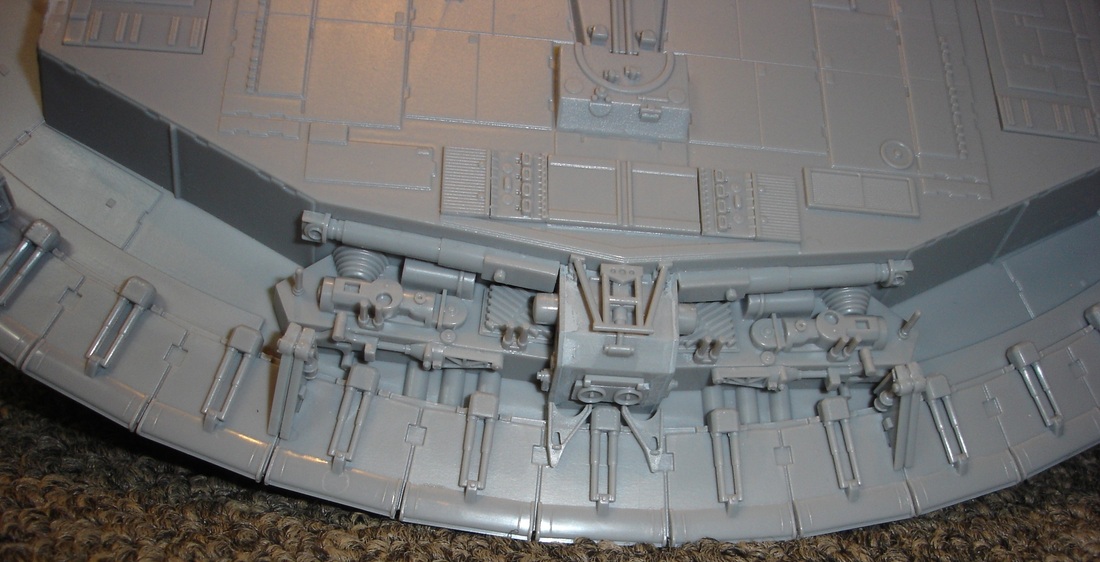
October 2009: Awesome! This complex looking assembly is testament to Fine Molds' expert care and dedication to detail. Once painted and weathered this mass of "widgets" will look spectacular!
FYI: I think the individual parts count (seen in this photo) exceeds 60!
FYI: I think the individual parts count (seen in this photo) exceeds 60!
Upper hull (port side)
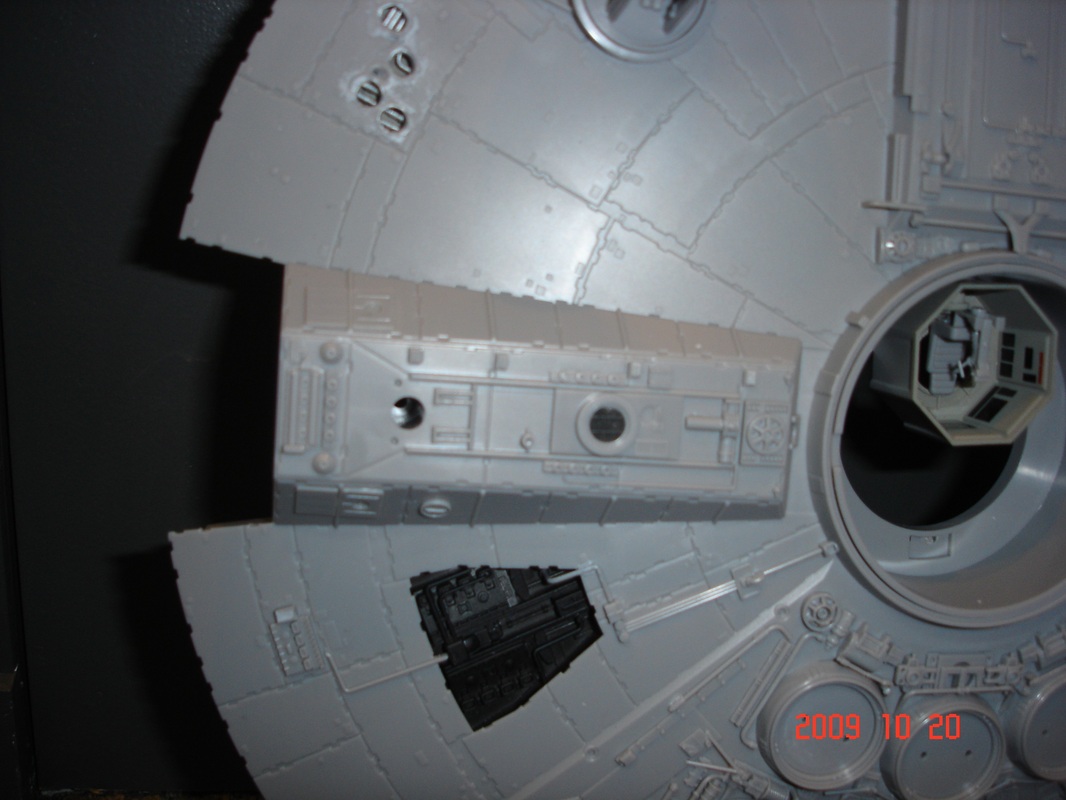
October 2009: Again, not a great pic! You can (kinda) see that classic battle damage behind the dish (top of pic). I opted for more dramatic damage than is customary here, with blast holes actually penetrating the armour plating, exposing the secondary skin, which is covered with pipes and wires.
The holes were made using a soldering iron (mwahahaha!), after which I softened and shaped them a little more with putty and sandpaper. Using a 50mm (2") square of sheet styrene as a base I built up layers of detail with bits of plastic, some pin heads, wires, and a paperclip! With a mounting pin on each corner of the construct to create some depth, I glue the second skin onto the underside of the hull, making sure that the best detail could be seen through the holes. Then I sealed the whole thing up with a strip of aluminium tape, just to be sure there would be no possible light leakage.
The holes were made using a soldering iron (mwahahaha!), after which I softened and shaped them a little more with putty and sandpaper. Using a 50mm (2") square of sheet styrene as a base I built up layers of detail with bits of plastic, some pin heads, wires, and a paperclip! With a mounting pin on each corner of the construct to create some depth, I glue the second skin onto the underside of the hull, making sure that the best detail could be seen through the holes. Then I sealed the whole thing up with a strip of aluminium tape, just to be sure there would be no possible light leakage.
You may also see above (at right) the small octagonal gunner's box which I have begun detailing (probably unnecessarily!) with tiny shapes cut from signwriter's vinyl. I hope to be able to add fibre optic lights around the box, if I can ever get the micro drill to pierce the vinyl from behind!
Update: November 2011
After constructing (or "destructing") the cockpit section I discovered Acreation Models' all new photo etch set for this kit, so duly ordered one for myself, and then waited a while for it to arrive,- which it has. So am pleased to announce this project is due to come back online. Stay tuned y'all...
