Anakin's Podracer
Source: Star Wars: The Phantom Menace
Brand: AMT
Scale: 1/32
Medium: Injection-molded styrene
Release Date: 1999
Pieces: 150+
Life Lost: 90 hours
Enhanced: Yes (see captions)
TSF Rating: * * * * *
"It's working. It's working!" By far, the most enjoyable AMT kit I have assembled to date, the podracer was simply a dream to build. As soon as I opened the box I was mesmerized by the crisp detail, and at every step of the assembly process I was further impressed by how nicely everything went together. No sloppy connections or gaps to fill and, overall the kit looked very accurate and faithful to the movie model. All this and the sheer number of parts in the box made this model appear more like a Fine Molds product than an AMT outing.
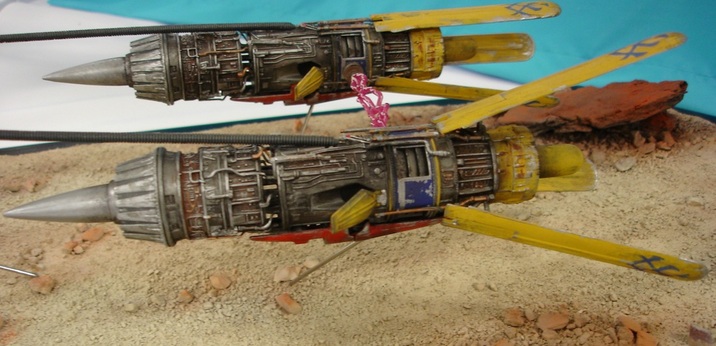
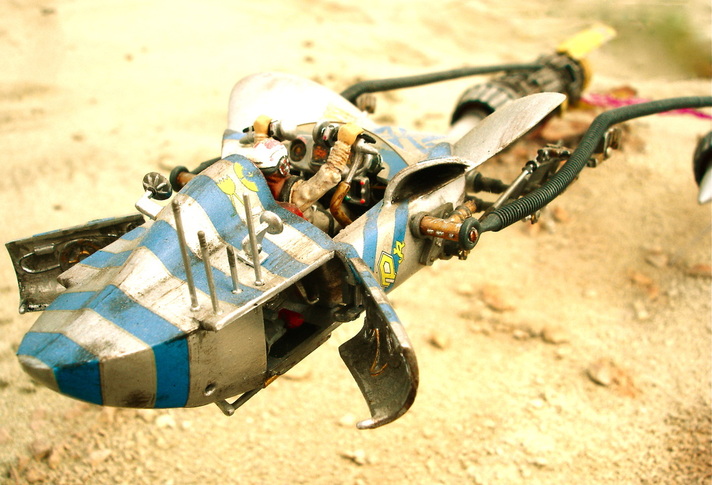
This isn't to say that the project didn't have it's "play fair or back in the box you go for some time out" moments. The extraordinarily fragile anatomy of the podracer made the final steps of assembly quite delicate. To note, in particular, the minute points of attachment for the control cables to the top of the engines was literally the weakest part of the structure, and definitely made this the hardest part of the assembly. To save myself from too much grief I opted to not permanently attach the cables to the engines. Instead, I replaced the short locating pins at the ends of the cables with slightly longer sections of a dressmaking pin, which were superglued into holes I had drilled in the cable ends. These new pins fitted quite snugly into the wee brackets atop the mighty jet units and, so just to be sure they would stay put, I tacked them in place with a tiny dab of artist's rubber cement. If the model ever gets a little bump or nudge (which happens more often than this proud dad would desire!) then it's no big deal if the connectors pop apart.
The five-star rating I gave this kit is credited, in part, to the above-mentioned hurdle, and others I will bore you with as we move on, because to really enjoy a kit build it should at least be a little challenging. To have a problem, or dilemma, or even a catastrophe to work through and then triumph over is simply one of the greatest successes a modeller can have. Well done to AMT for giving me this experience!
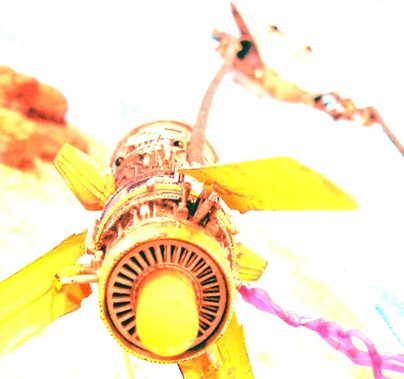
I did have big plans to alter the air intake scoops and make them adjustable instead of fixed in one of three positions as per the instructions. I came up with a cunning but complex plan to be able to manually rotate the intake fans which in turn would open or close the "tri-foils" simultaneously. In engineering terms I got way ahead of myself and resorted to making them semi-adjustable. This involved glueing the "full open" option pieces of the hydraulic assemblies to each foil and then cutting three slots on each engine where the locator holes were, just big enough to snugly accommodate the hydraulics. So now I just (gently) open or close each scoop individually as desired. Unfortunately this is another delicate and weak part of the podracer design which, even if assembled as per instruction, ultimately lends itself to "random dismantling"!
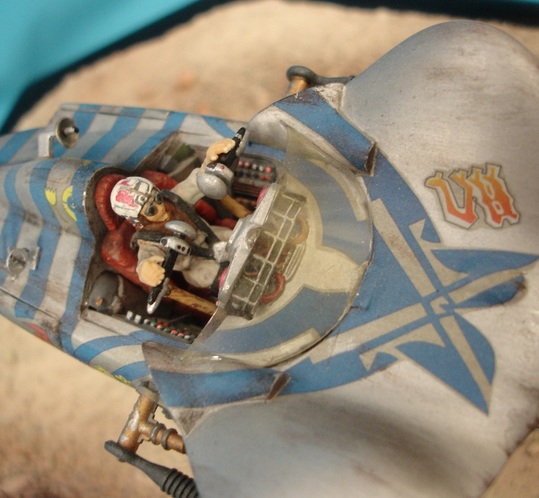
The detail in the cockpit was pretty good, however I did try enhancing it further with some creases to the leather seat, and an extra gadget/screen thingy below the main dash (which can't be seen here). Also I hollowed out the "frame work" behind the dash, which can be seen beneath the windshield, and delicately inserted some "spaghetti" made from snippets of painted copper wire. All this, along with some heavy weathering helped to make the pod look far more ramshackle and second-hand.
A small catastrophe occurred when (somehow!) I lost one of the tiny clamps that hinge those air vents on the engine flanks. After hours of searching, irreparable hair loss, and a mental breakdown I had to settle for whittling a new one from a scrap of plastic. Once in place I covered it in so much weathering gunk that it would take a fairly keen eye to notice which one doesn't look like the others!

There were no decals for the three display screens on Anakin's dashboard so I resorted to colour photo copying and reducing the images over and over from the Star Wars: Episode I Visual Dictionary. So small now they are just a blur,- but I know they're there!
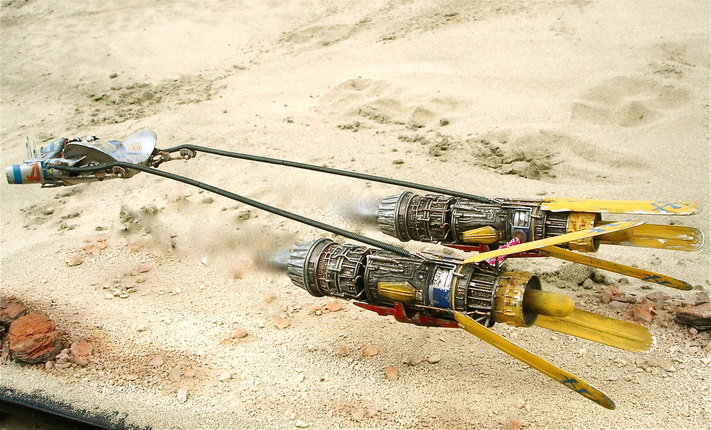
These last few photos were taken (very quickly!) at our local beach, and subjected to my poor "photoshop" skills. Please ignore the giant footprints!
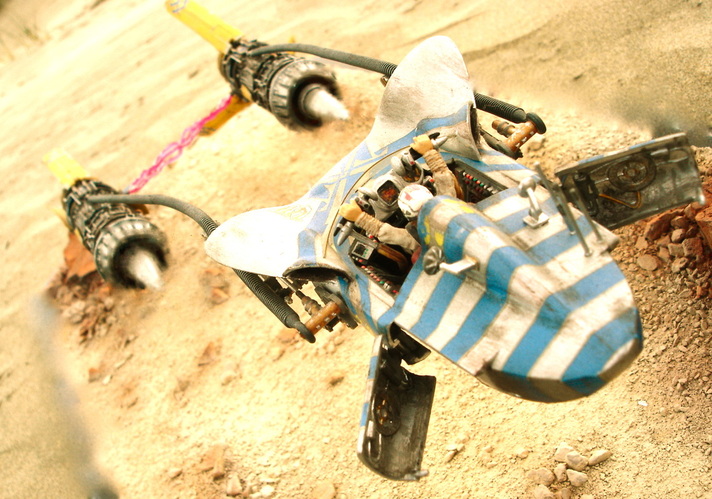
Must admit those stripy decals were painful and troublesome to get right as this build was my pre Micro Sol and Micro Set days. If I had discovered those miracle elixirs back then life would have been a lot more pleasant. (Had to settle for a more alcoholic elixir,- applied to the modeller, not the model!!)

Watch out for sand people camped out on the plateau!
All images property of The Starship Factory 2014.
